Emotion API で怒り顔スカウターを作ってみた
こんにちは、ソリューション開発部の柴崎です。
以前、Face API の記事を書きましたが、今回は Face API と同じ Cognitive Services APIs である Emotion API (2017年10月現在、プレビュー機能) を使った感情の検出を調べましたのでご紹介します。
Emotion API を使えるようにする
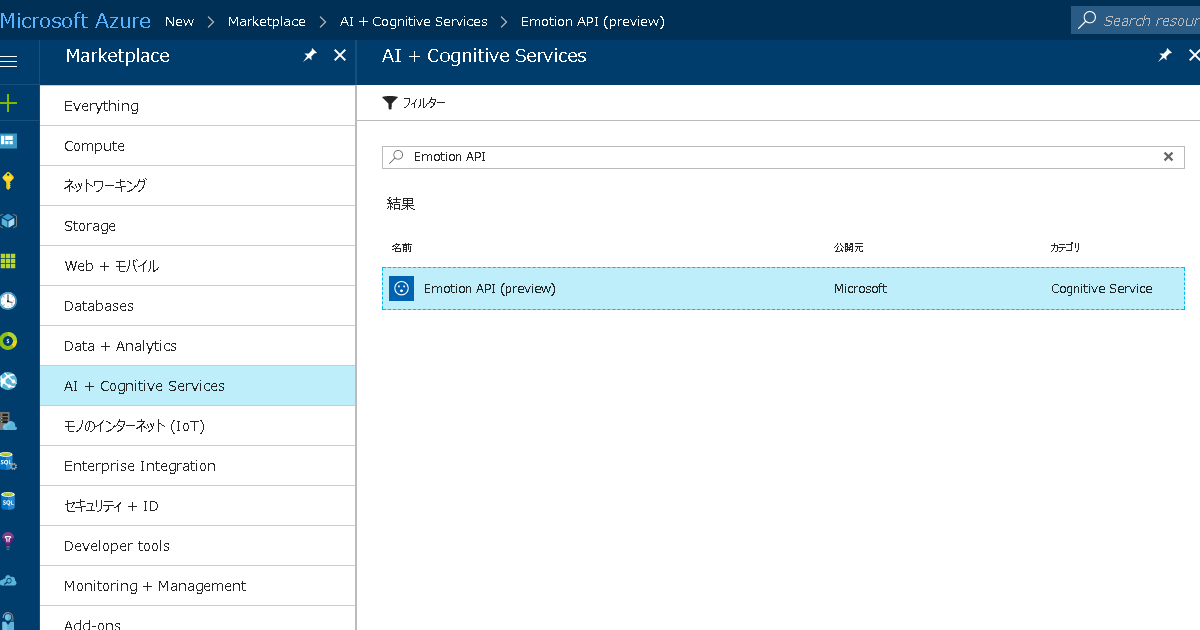
Azure Portal より、適当なリソースグループに Microsoft Cognitive Services の Emotion API を作成してください。
今回の試用目的であれば、Free (F0) を選べば十分かと思います。
Ocp-Apim-Subscription-Key を取得する
Cognitive Services accounts から先ほど作成した Emotion API を選択します。表示されたリソースの「Show access keys」リンクをクリックします。

表示された KEY 1 (または KEY 2) の値を Ocp-Apim-Subscription-Key として使用します。後で利用しますので覚えておいてください。

Emotion API の種類
Emotion API には4つの API があります。静止画と動画の2種類があり、今回は静止画用の Emotion Recognition を利用します。
試用
API は非常にシンプルで、以下のようになります。以下の例は、画像の URL を指定する方法です。
curl -v -X POST "https://westus.api.cognitive.microsoft.com/emotion/v1.0/recognize" \
     -H "Content-Type: application/json" \
     -H "Ocp-Apim-Subscription-Key: ********************************" \
     -d '{ "url": "http://path/to/image" }'
Ocp-Apim-Subscription-Key には、上記で取得したキーを、リクエストボディの URL には、適当な顔写真を指定してください。正常に解析できた場合、以下のようなレスポンスが返されます。(以下は整形済み)
[
  {
    "faceRectangle": {
      "height": 191,
      "left": 27,
      "top": 58,
      "width": 191
    },
    "scores": {
      "anger": 0.9942898,
      "contempt": 1.13255492e-05,
      "disgust": 0.00569310365,
      "fear": 7.71813632e-07,
      "happiness": 6.00241265e-07,
      "neutral": 2.9389787e-06,
      "sadness": 5.284597e-07,
      "surprise": 9.446003e-07
    }
  }
]
顔認識に成功し、顔の範囲とどのような感情であるかがわかります。この例ではとても怒っていることがわかります。感情の高い順に並べると以下のようになります。
| Key | Value |
|---|---|
| anger | 0.994289800000000 |
| disgust | 0.005693103650000 |
| contempt | 0.000011325549200 |
| neutral | 0.000002938978700 |
| surprise | 0.000000944600300 |
| fear | 0.000000771813632 |
| happiness | 0.000000600241265 |
| sadness | 0.000000528459700 |
怒り顔スカウターを作る
Emotion Recognition の API を使い、顔の範囲に某スカウターのようなものを重ねた画像を作成してみましょう。単なる悪ノリなため詳しい説明は省略しますが、以下の例では curl, jq, ImageMagick を利用して画像をアップロードし取得した顔認識の情報から画像を生成しています。先述の試用の例とは異なり、Content-Type が application/octet-stream、リクエストボディに画像のバイナリを設定しています。
file_name=path/to/face_photo

response_body=$(
  curl \
    -X POST 'https://westus.api.cognitive.microsoft.com/emotion/v1.0/recognize' \
    -H 'Content-Type: application/octet-stream' \
    -H 'Ocp-Apim-Subscription-Key: ********************************' \
    --data-binary "@$file_name" \
)

h=$(echo $response_body | jq '.[0].faceRectangle.height')
l=$(echo $response_body | jq '.[0].faceRectangle.left')
t=$(echo $response_body | jq '.[0].faceRectangle.top')
w=$(echo $response_body | jq '.[0].faceRectangle.width')
a=$(echo $response_body | jq '.[0].scores.anger * 10000000')
r=15

convert "$file_name" \
  -fill green  -stroke none   -draw "fill-opacity 0.5 roundRectangle -$r,$((t - r)) $((l + w + r)),$((t + h + r)) $r,$r" \
  -fill none   -stroke yellow -strokewidth 2 -draw "stroke-dasharray 1 8 circle $((l + w / 2)),$((t + h / 2)) $((l + w / 8)),$((t + h / 2))" \
  -fill yellow -stroke none   -draw "fill-opacity 0.5 path 'M $((l + (w * 7 / 16))),$t L $((l + (w * 9 / 16))),$t L $((l + (w / 2))),$((t + (h / 16))) Z'" \
  -fill none   -stroke yellow -strokewidth 2 -draw "stroke-opacity 0.5 line $((l + (w / 4))),$((t + (w * 3 /4))) $l,$((t + w))" \
  -fill none   -stroke yellow -strokewidth 2 -draw "stroke-opacity 0.5 line $l,$((t + w)) $((l + r)),$((t + w))" \
  -fill yellow -stroke none   -pointsize $r -draw "text $((l + (w / 8))),$((t + h + (r / 4))) '$a'" \
  "${file_name%.*}_out.${file_name##*.}"
適当な顔写真を選びスクリプトを実行してみましょう。

それっぽいスカウターの画像を作成することができました。このように、Emotion API を使うことで、感情を数値化し利用することができます。怒り以外の感情も取得することができますので、ぜひ利用してみてください。